


Gardening: Some Transplanting Tips

Spring planting season is here and lots of folks are sticking vegetable transplants in the ground. How you plant will determine whether they grow to their genetic potential.
First, be sure to select for good quality transplants. I recommend buying from local growers and nurseries. Some of the garden centers sell transplants that were grown in nurseries far away where weather conditions might be different. They probably sat in trucks and distribution facilities for who-knows-how-long. Hopefully someone is watering them when they are dry – and more importantly – not watering them when they are wet.
When purchasing plants, try to inspect the root ball. You want a tight root ball that holds onto the planting mix. You don’t want plants with sparse roots or plants that are root-bound. Root-bound plants have been in too small of a pot for too long. Their roots begin wrapping around the inside of the container in a circle. If you buy root-bound plants, you should cut away some of the outer roots to loosen up the root ball, which will allow the roots to grow away from the plant. If you don’t, the root-bound plant will probably not develop a very extensive root system. It will probably suffer in dry weather and never produce a lot of fruit.
Second, new transplants need to “harden off ” for a few days before you plant them in the garden. These transplants likely spent most of their young lives in the comfy confines of a temperature and humidity-controlled greenhouse, protected from the wind, or under shade cloth protected from the harsh sun. They need to be acclimated to the outside world.
You can “harden off ” new transplants by placing them in a shady spot protected from the wind, such as a porch. Move them out and expose them to full sun and wind for a few hours the first day. The following day, leave them out for a half a day. On day three, leave them out the whole day. You can safely plant them at this point.
Third, provide your new transplants with ample water and nutrition at the time of planting. If you are planting in an outside garden or raised bed, make sure to amend the bed with some of the things I recommended in my previous columns: compost, dry organic fertilizer like Medina Growin’ Green, whole ground cornmeal, molasses, and rock minerals such as Azomite or lava sand.
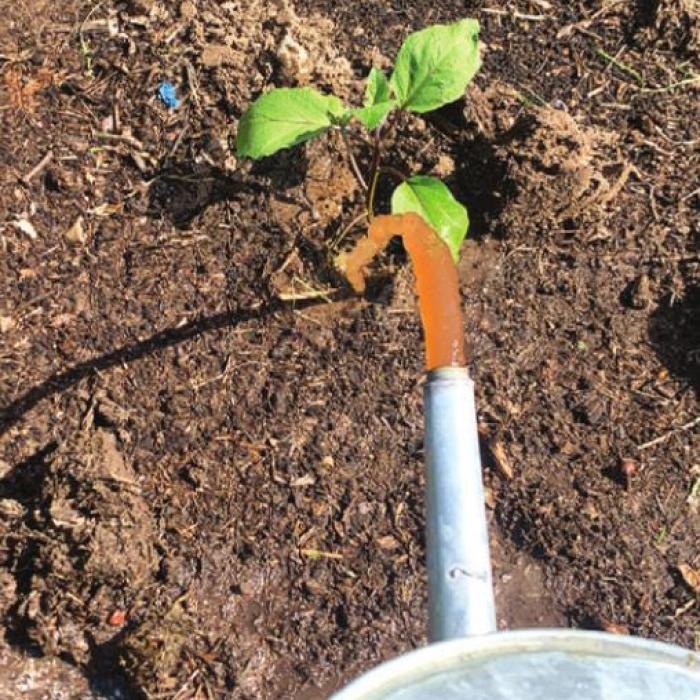
Before you get ready to plant, fill a two gallon watering can with water and mix in about two to four ounces of fish emulsion and four ounces of liquid molasses. Feel free to use any liquid organic fertilizer if you don’t have fish emulsion or liquid molasses.
You should dig a hole a little wider than your transplant’s root ball. Place the transplant in the hole. Here’s the important part – fill each hole with the fertilizer mixture. Let the rootball and surrounding soil absorb the water before gently but firmly packing soil around the roots. This will give each transplant a nutrient-rich zone of moist soil to start growing.
If you are planting in a container, be sure to use a good quality potting mix such as the Fox Farm’s Happy Frog Potting Soil, which is made from natural materials like earthworm castings, bat guano, and aged forest products (available for purchase locally at La Grange Farm and Ranch).
I do not recommend MiracleGro potting mixes and other similar products that contain peat, an unsustainable resource, and harmful synthetic chemical fertilizers.
Don’t plant into a container with dry soil and then try to water. It’s better to moisten the soil in the container first and then plant. Soil nutrients easily leach out of containers, so it’s very important to supply nutrients regularly to container plants. I recommend using liquid fertilizers made from natural resources such as Medina Hasta Grow Plant Food or MicroLife’s Ocean Harvest liquid organic fertilizer. You should probably fertilize container plants every two weeks to maximize production for crops like tomatoes, peppers and eggplants.
Finally, don’t water too often. Most vegetable crops grow best when they experience repeated wet and dry cycles. Vegetable crops tend to experience disease and pest pressure when the soil stays wet. They won’t grow if the soil stays dry.
When you water, water thoroughly. Let the soil dry out completely before you water again, but don’t let it get too dry and become hydrophobic – that’s when soil gets so dry that it doesn’t absorb moisture and water just runs off it like glass.
Use the finger test to determine when you need to water. Stick a finger into the soil knuckle-deep and pull it out. If your finger comes out dry, you probably need to water. If you can feel moisture or if a little soil sticks to your finger, you probably don’t need to water.
Tomatoes have the ability to grow roots from their stems. Accordingly, you can plant tomatoes deeper to encourage a more extensive root system. This will help your plants survive dry spells.
It may also help the roots mine nutrients from deeper in the soil where other plants can’t reach.